Hello there, this is Avishekh here, your friend and your today’s tutor. Hope you are doing great there. Today, I am gonna share with you the method of drawing a beautiful butterfly in the simplest way possible. We will do this following our butterfly drawing easy tutorial that you are going through right now. So, you are at the right place.
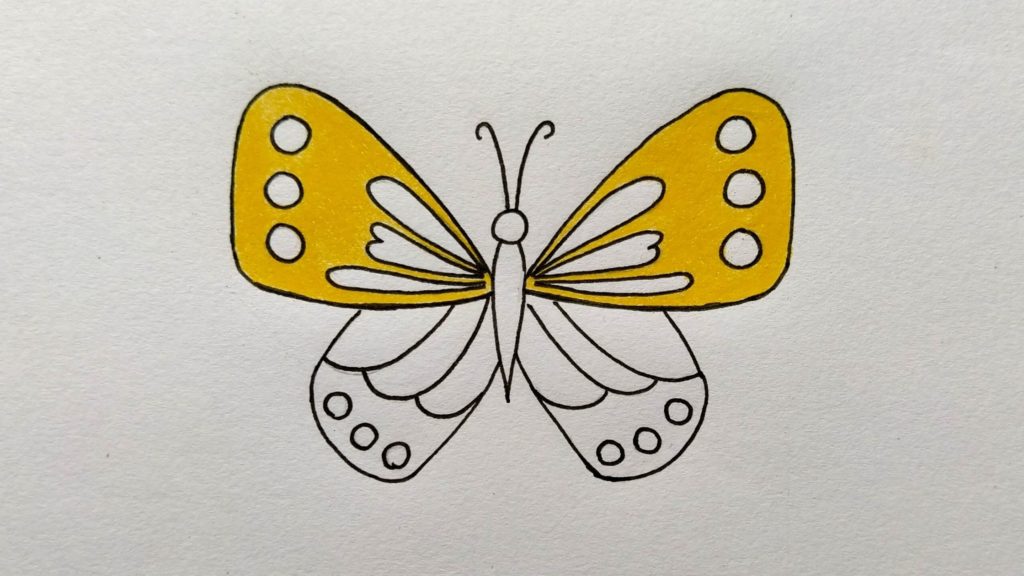
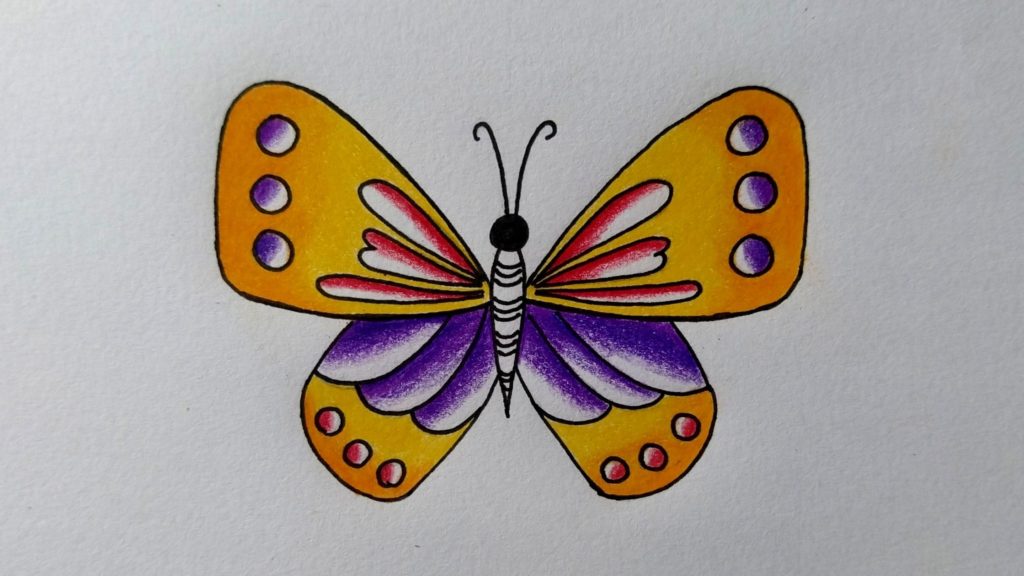
The method used here is our self-developed technique which is unique in itself. The method of making this butterfly would be too easy to draw even for someone having zero experience in this field. And let me tell you, you will be amazed looking at the results. So, before digging into the practical drawing part, let me show you some of the final images of the butterflies that you are going to make following this tutorial.
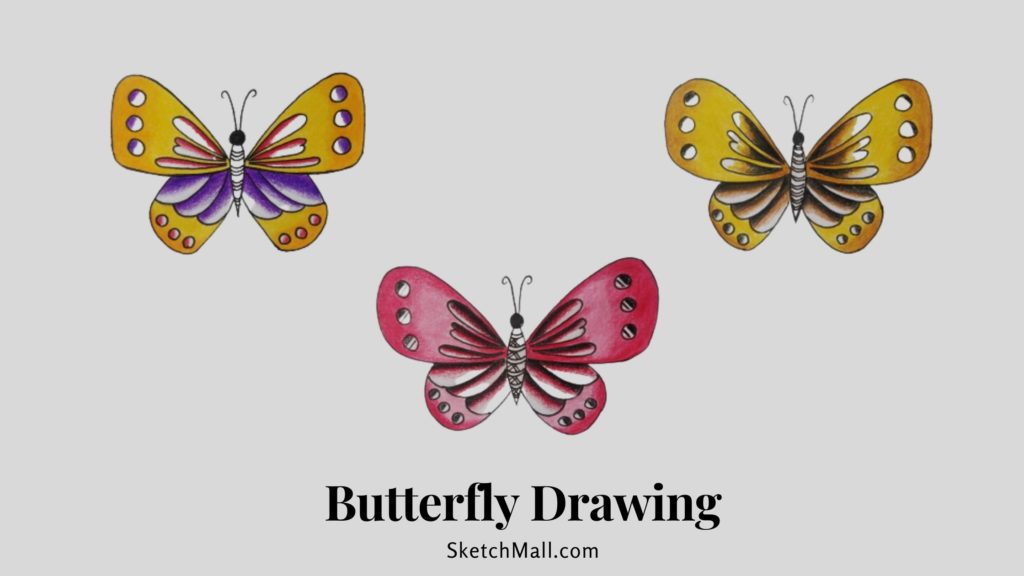
Isn’t the above drawings amazing? Believe me, you are going to make the exact drawing by the end of this article. And most importantly, you could even draw other varieties of butterflies as well by trying different color combinations. So, let’s begin.
Name of Body Parts Used in Butterfly Drawing Easy Tutorial:
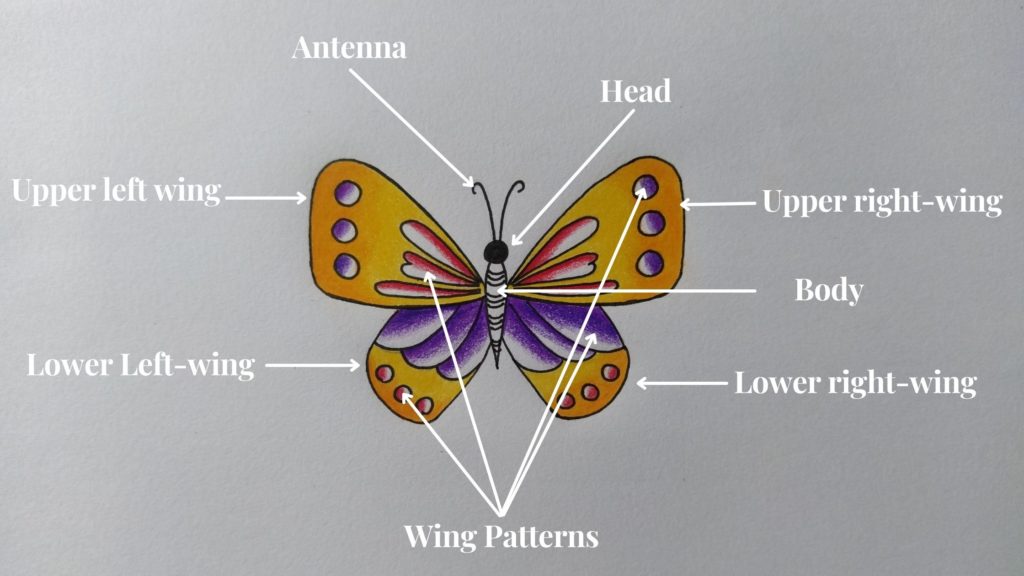
Let us know a little bit about the names of the various body parts of the butterfly that we are going to use for the rest of this butterfly drawing easy tutorial. I shall recommend you to go through all the body part names carefully because it will be helpful for you to understand this tutorial properly. For your ease, we haven’t used any difficult or scientific names here.
- Head
- Body
- Antenna
- Upper left wing
- Upper right-wing
- Lower left wing
- Lower right-wing
- Wing Patterns
Now, we are ready to move forward in the practical part.
So, are you ready and excited to make this beautiful butterfly drawing of your own? I think you are. So, let’s begin to make it with the following materials that should be there with you.
Materials Required for This Butterfly Drawing:
Be prepared with the following materials to start making the butterfly.
- Paper
- Pencil
- Eraser
- Scale
- Black Marker
- Pencil Colors
If you don’t have pencil colors, you could use whatever colors you have. And if you don’t have a black marker, you could use black pencil color or black pen to do the required.
Time Required for this Butterfly Drawing:
The approx time required to complete this butterfly drawing easy tutorial and make your own beautiful butterfly is 1 hour for a complete beginner. On the other hand, others may complete it even quicker.
Practical Step by Step Guide for Butterfly Drawing Easy Tutorial:
Now we are completely ready with all the necessary materials to make this amazing butterfly drawing. So, let’s begin.
Making of Structure for Drawing Butterfly Accurately:
First of all, we will make a structure with the help of a pencil with soft hands. Do not draw darker lines because, at the end of it, we will anyhow going to erase it. Confused? Why we are even making this structure if we need to erase it at the end?! Well, this structure will help us draw our butterfly accurately with ease and it will also help us to eliminate the most common problem of making uneven sizes of left and right wings. So, let’s begin.
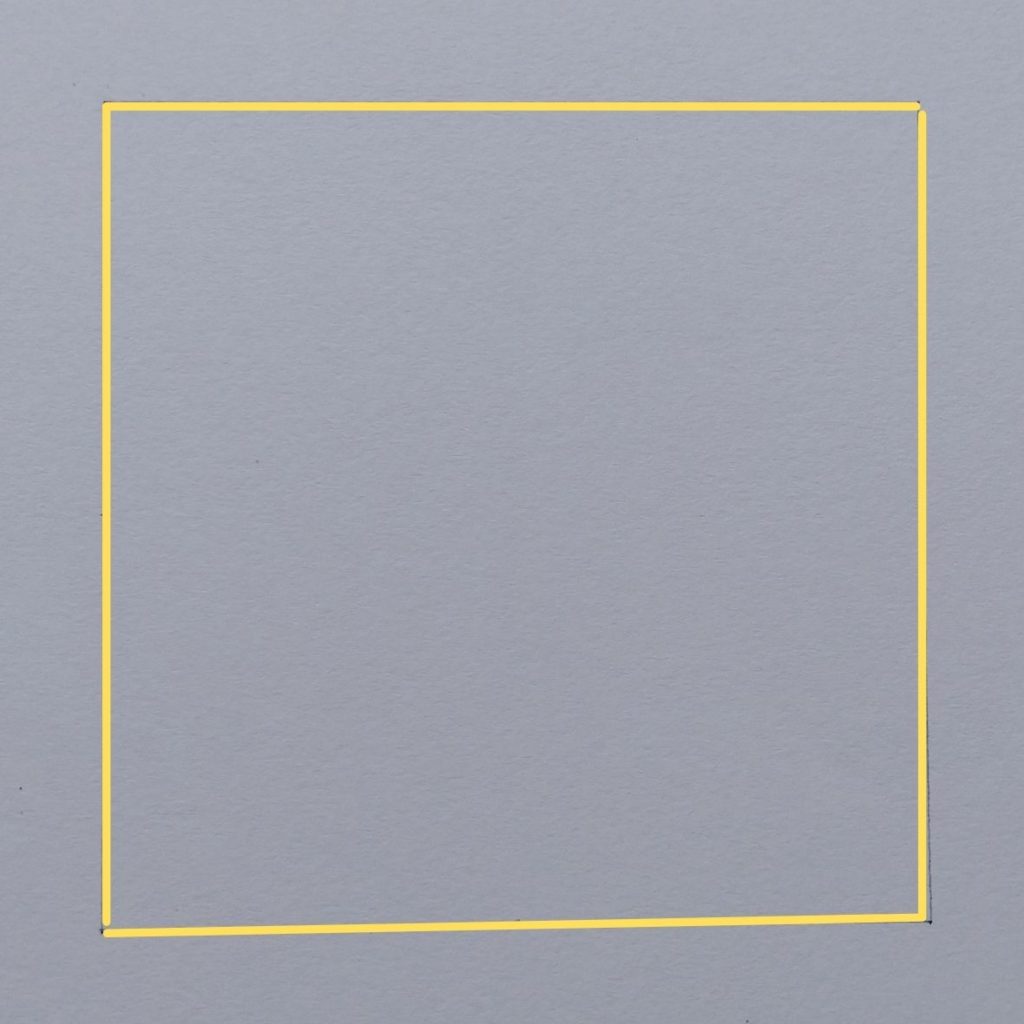
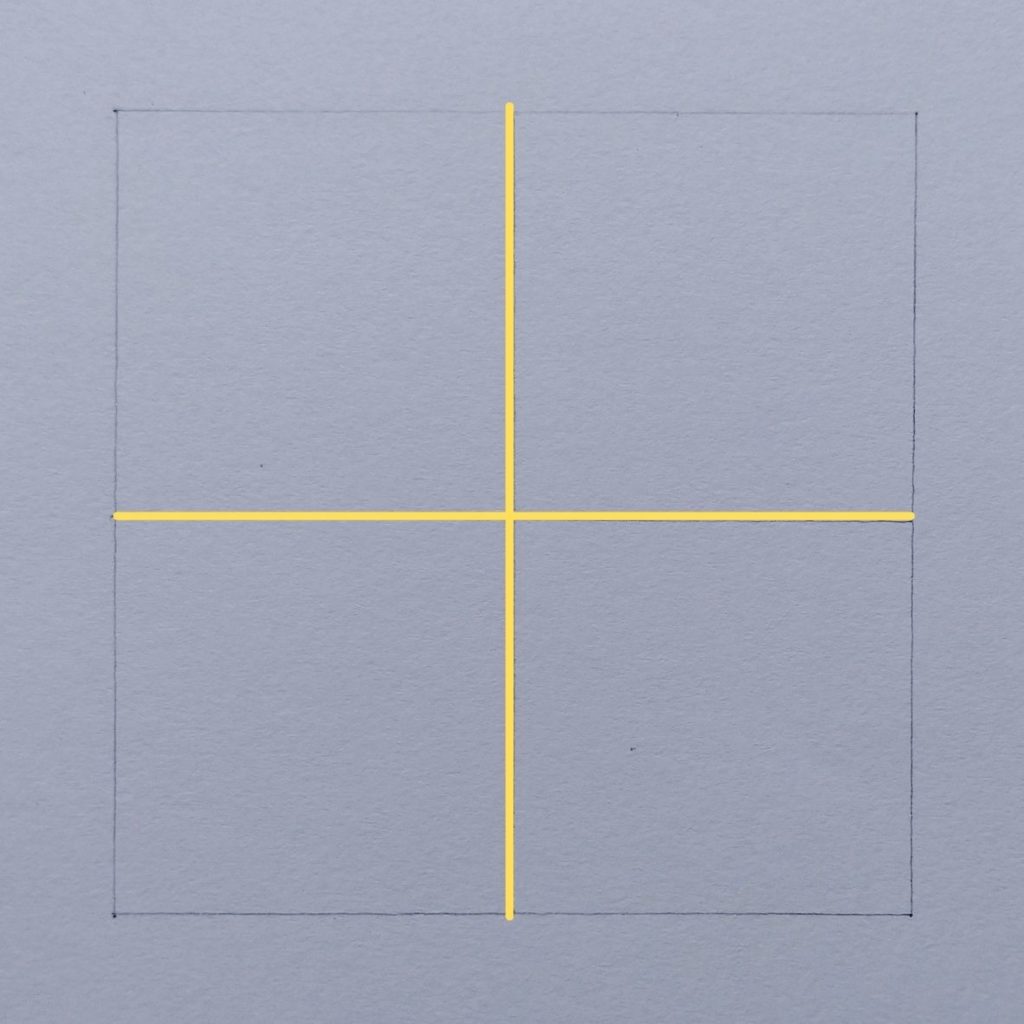
Step-1: Draw a Square:
Let’s start with making a square on the center of your page. You might be drawing it on A4 size or a little smaller page. But our butterfly drawing shouldn’t be that large. It should not cover the entire page. And as a beginner, it is advisable to draw it smaller first. It will provide you more accuracy with lesser efforts. So, draw a square with the help of a scale keeping the length of each side around 8 CMs. You could increase or decrease it if you want.
Step-2: Draw a Plus Sign Inside of the Square:
Now, draw a plus sign inside of the square. That means you need to draw a horizontal and a vertical line inside of the square that will cut each other exactly on the center of the square.
Step-3: Draw 2 “V” shapes:
The next step is to draw 2 “V” shapes inside of the square. The 1st one on the upper half portion of the square and the 2nd one on the bottom half portion of the square. The bottom of both the “V” shapes should hit the middle center and the bottom center of the square.
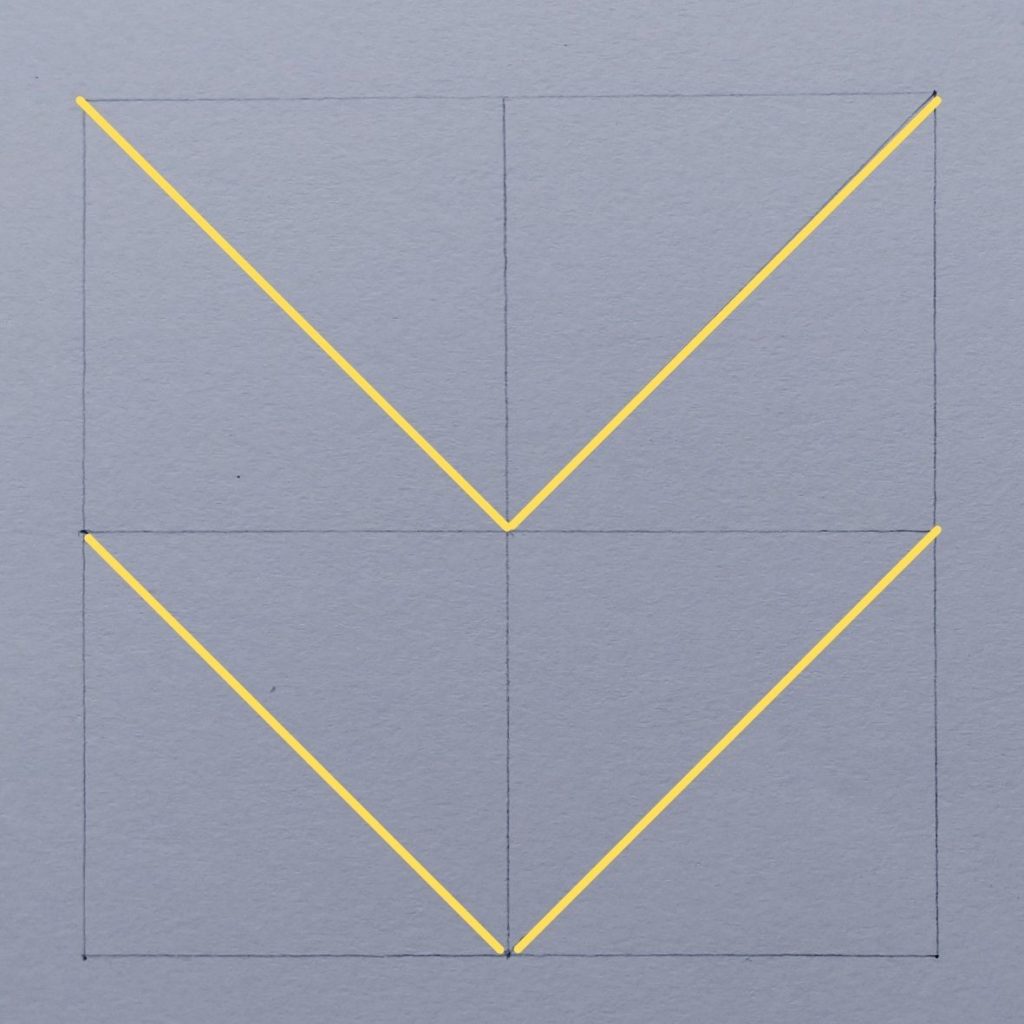
It sounds very confusing but it is not. Just follow the image given above for your reference and do the exact same thing. It’s just two “V” shapes. It couldn’t be difficult at all.

Your final structure should look something like this.
Now, we are ready with our final structure based on which we are going to proceed in our butterfly drawing easy tutorial. This structure will help us a lot which you would be able to realize in the upcoming steps.
You need to draw the remaining few steps with a pencil only. I have used the black marker just to make the drawing visible to you. But you need not follow this practice now as you need to erase your drawing multiple times to get the desired results. Once, the drawing would be ready, I will tell you to highlight the entire outline with a black marker before coloring it.
Step-4: Draw the Head and the Body of the Butterfly:
Now, the real fun will start. As we are now going to make the actual body parts of the butterfly. So, let’s start with making the head and the body of the butterfly. It should be in the exact center of the square. Just follow the reference image given below.
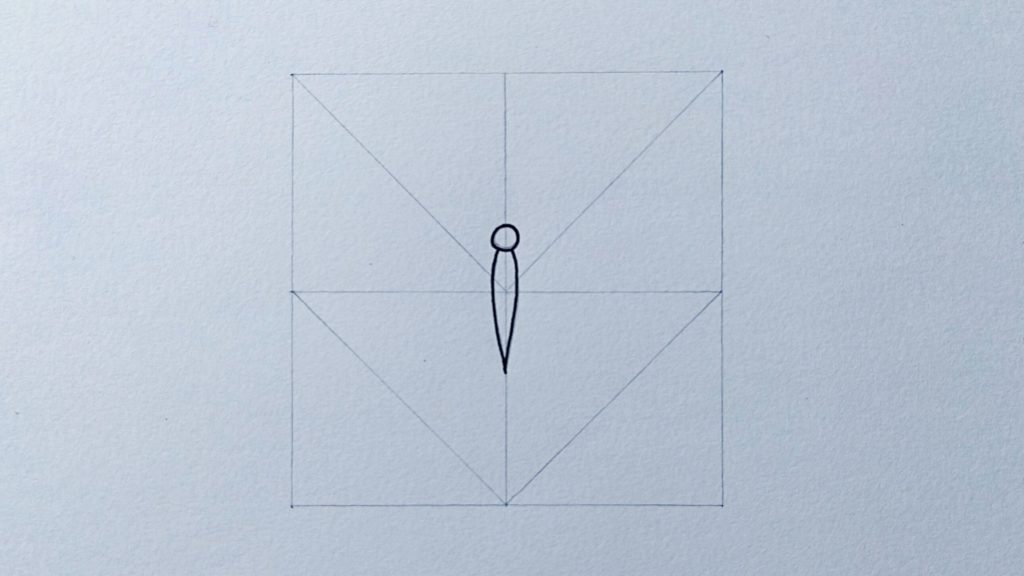
We have kept the design of the body and the head too simple for you to draw.
Step-5: Start Making the Outline of the Left and Right Upper Wings:
Start with making the outline of the left and right upper wing of the butterfly. Try to make both the wings identical to each other. Use the structure that we had made earlier to make your outline on both sides.

Step-6: Complete the Outline of the Left and the Right Upper Wings:
The next step is to complete the outline of the left and right upper wings and connect it with the body of the butterfly. The most important thing here is to make both left and right wings identical to each other. Don’t apply too much pressure on your pencil. Make it with light hands and erase it, if necessary, until you get the exact identical wings on both sides.
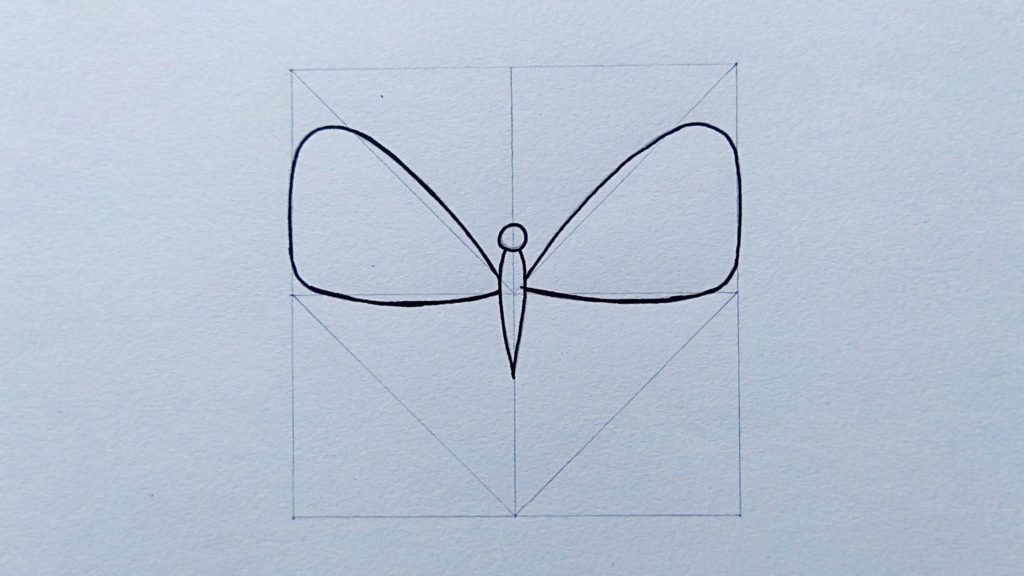
Step-7: Start Outlining the Lower Left and Right Wings:
Start making the outline of the lower left and right wings. Its outer portion will start from the upper wings and the inner portion will start from the lower body part of the butterfly.
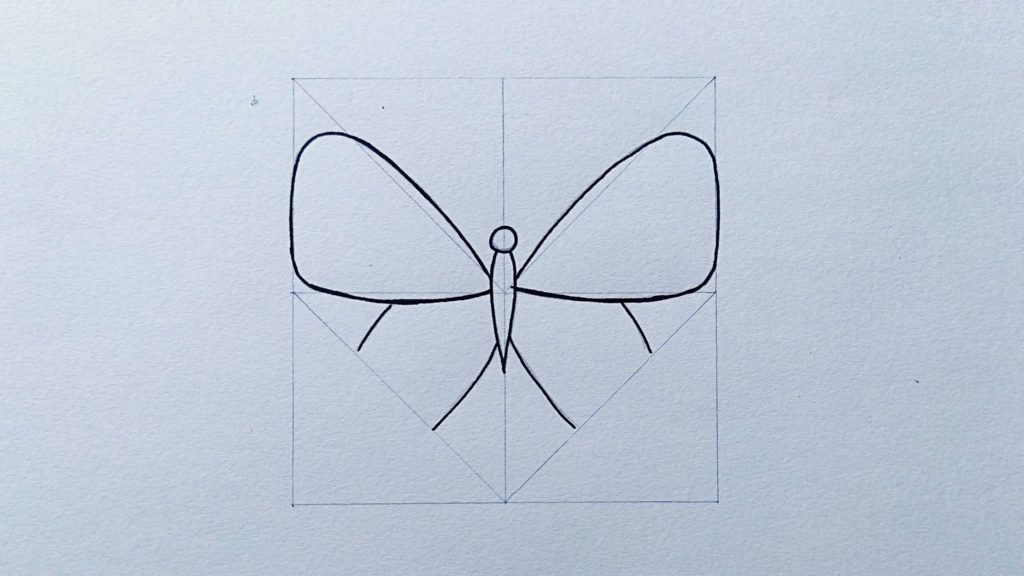
See the reference image and make similar lower wings.
Step-8: Complete Outlining the Lower Left and Right Wings:
Now, let’s complete the outlining of the lower left and right wings. Use the pencil with smooth hands to make the similar wings as given in the reference image. Don’t hesitate to use the eraser multiple times until you are fully satisfied with your outline.
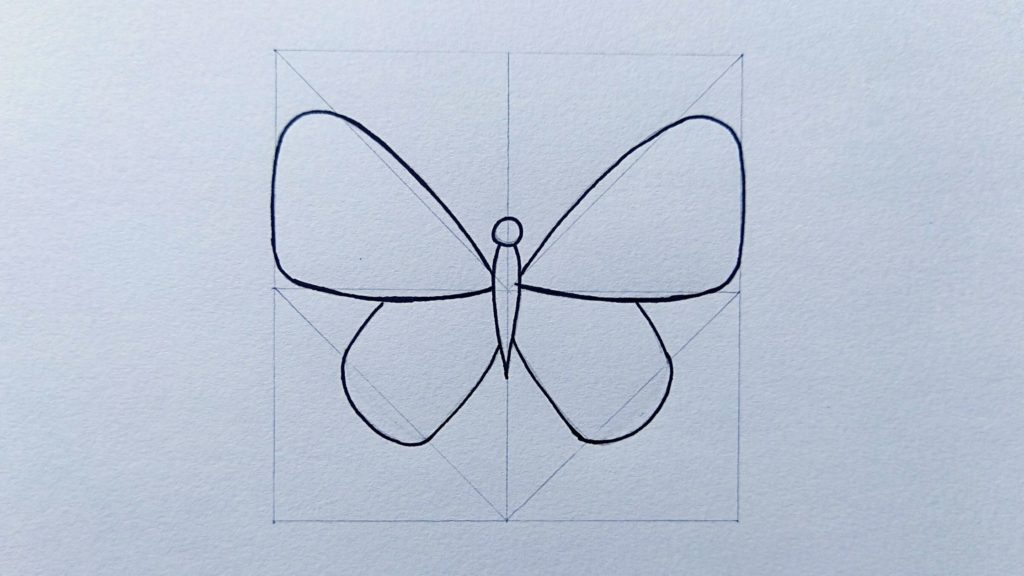
Once you are done till this point, erase all structures that you had made with a pencil earlier in step-1 to 3. We do not need those structures anymore.
Hurray! We have successfully completed quite some steps of our butterfly drawing easy tutorial. As a result, our butterfly drawing has taken a basic structure. Now, we need to make our butterfly beautiful by making the beautiful shapes inside the butterfly wings. So let’s move to the next step.
Step-9: Designing the Butterfly Wings Using Wing Patterns (Butterfly Drawing Easy Tutorial):
In this step, we will make various designs for all the butterfly wings one by one. I have selected a very easy design for you to draw for the wings. Each butterfly has different patterns on its wings. So, don’t worry if your design looks a little different from the reference images given here. But make sure to draw identical shapes for the left wings as compared with the right wings. So, let’s start.
(a) Designing the Upper Right Wing:
Just start with making 3 long shapes (wing patterns) on the inner side of the upper right-wing, the portion which is close to the body of the butterfly. As you can see in the reference image that the end portion of the middle long design is in the heart shape. Once you are done with it, just add 3 circles (wing patterns) as well on the outer portion of the upper right wing. You are all done.
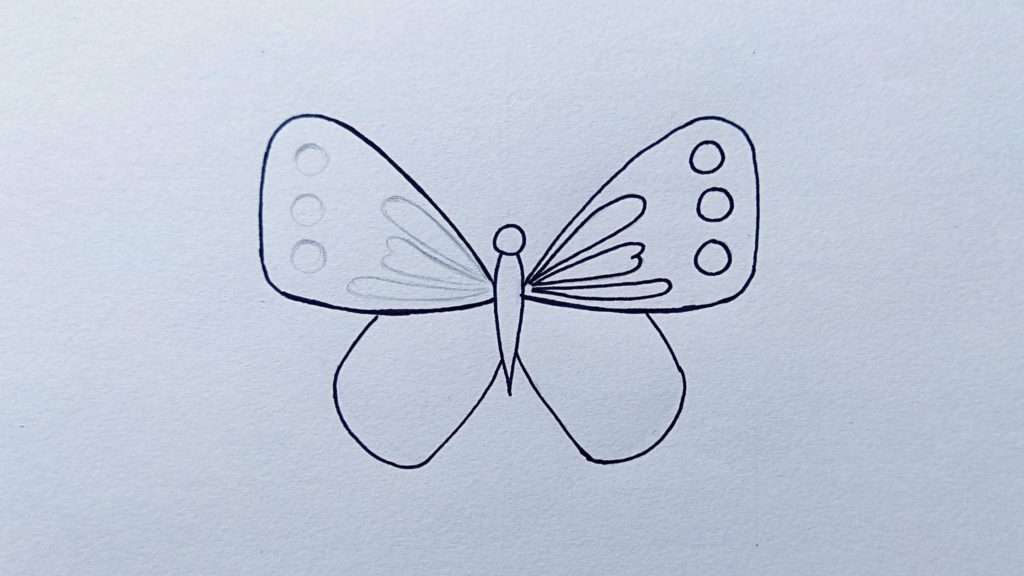
(b) Designing the Upper Left Wing:
Follow the same steps as you followed for the upper right wing to draw designs to the upper left wings. Make sure that the design (wing patterns) of both the upper left and right wings should look identical.
(c) Designing the Lower Right Wing:
Now start making 3 long shapes (wing patterns) on the inner portion of the lower right-wing, the portion which is close to the butterfly’s body. Once you are done with 3 long shapes, make 3 circles (wing patterns) on the outer portion of the lower right wing of the butterfly. Always take the help of the reference image to draw.
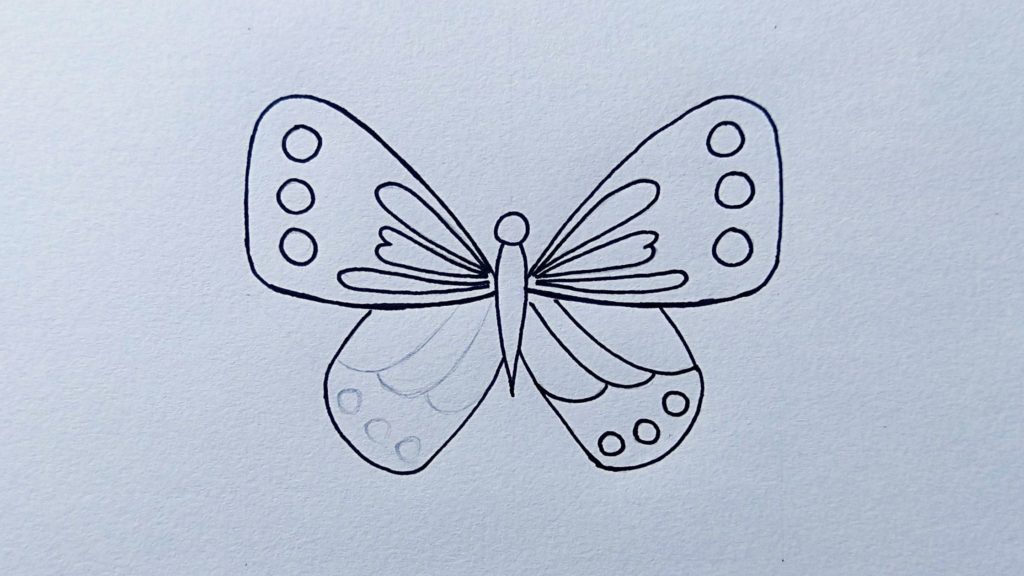
(d) Designing the Lower Left Wing:
Follow the exact same steps as you have just followed in the above (c) point to make identical designs (wing patterns) on the lower left wing as well.
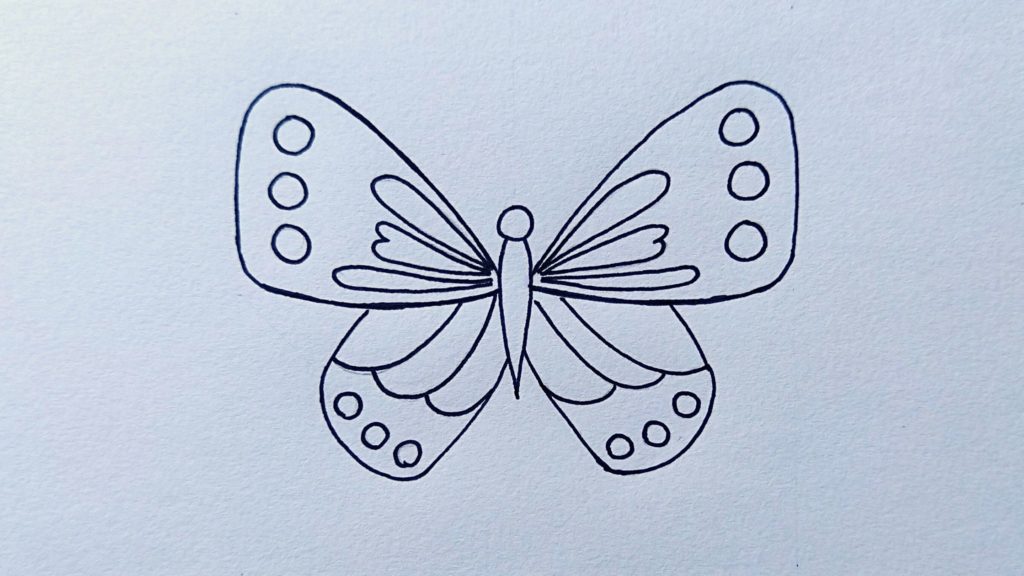
Step-10: Make Antenna on the Butterfly’s Head:
Now make two nearly parallel shapes on the head of the butterfly. It should not be exactly parallel but it should be close to the “V” shape. It will start from the upper portion of the butterfly’s head and will take a curve shape at the very end.
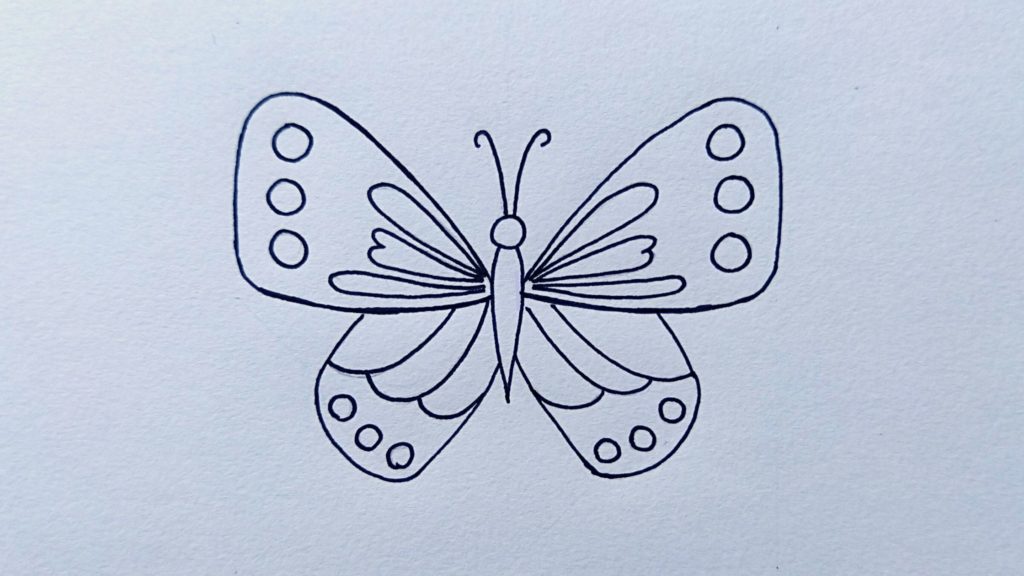
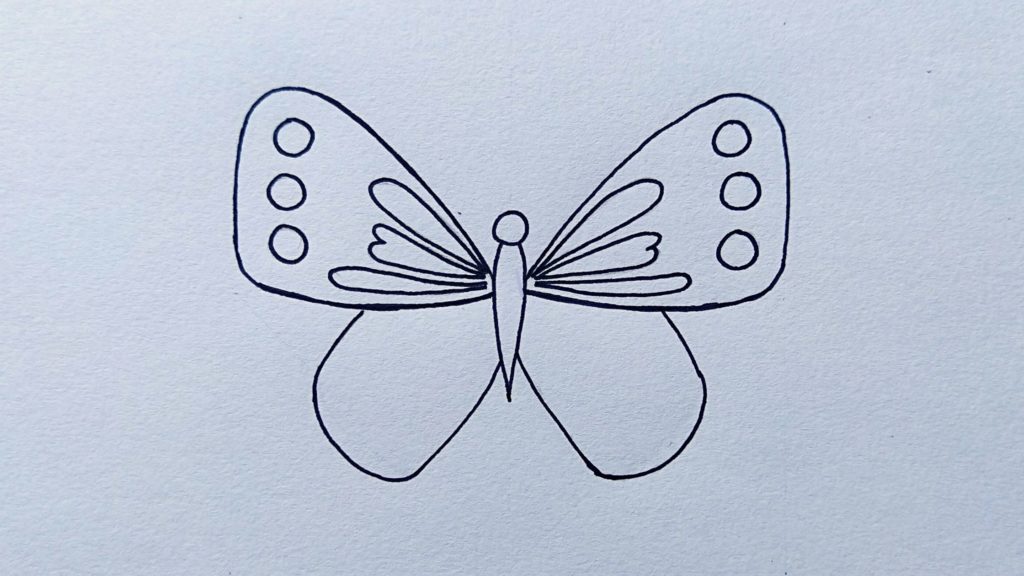
Step-11: Outlining the Entire Butterfly with a Black Marker:
As I had told you at the beginning of this butterfly drawing easy tutorial that once the outline of your butterfly would be ready, you have to highlight the entire outline with a black marker. It is important to darken the entire outline before starting to color your butterfly. This step will enhance the beauty of your butterfly drawing.
It is not important to use any particular marker brand, you could use any black marker for this step. As I have already made my drawing using a black marker only, I need not do this step with you again.
If you don’t have any black markers, you could also use a black pen or a black color pencil for the same.
Yahoo! We have achieved another milestone together. Our butterfly outline is done! You are doing great! Our butterfly drawing easy tutorial is almost to its end. We just need to color our beautiful butterfly now.
Step-12: Start Coloring Your Butterfly (Butterfly Drawing Easy Tutorial):
(a) Color Upper Left Wing:
We are gonna use a medium yellow pencil color to color our upper left wing. Try to evenly color the entire wing. Keep the pressure of your hand even to avoid uneven color shades. See the reference image for more clarity. Remember, do not color inside of the shapes (wing patterns) that you have drawn inside the wings.
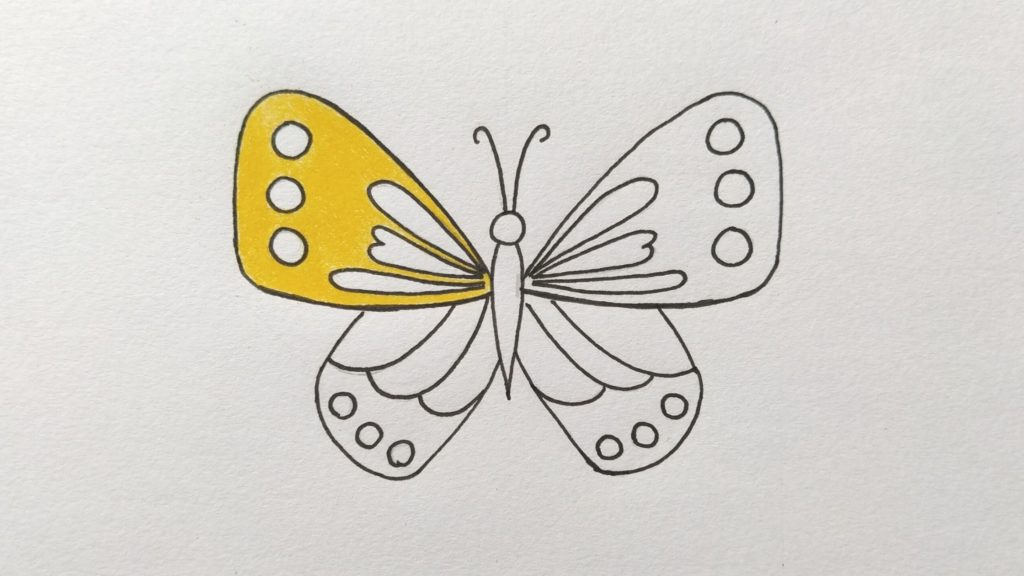
(b) Color Upper Right Wing:
Use the same color and method to color the right-wing as you used to color the left one in the above step.
(c) Color Both the Lower Left and Right Wing:
Again you need to use the exact same color i.e, medium yellow to color both the lower left and right wings. Use the same method here also. Do not fill color inside the wing patterns drawn on the wings.
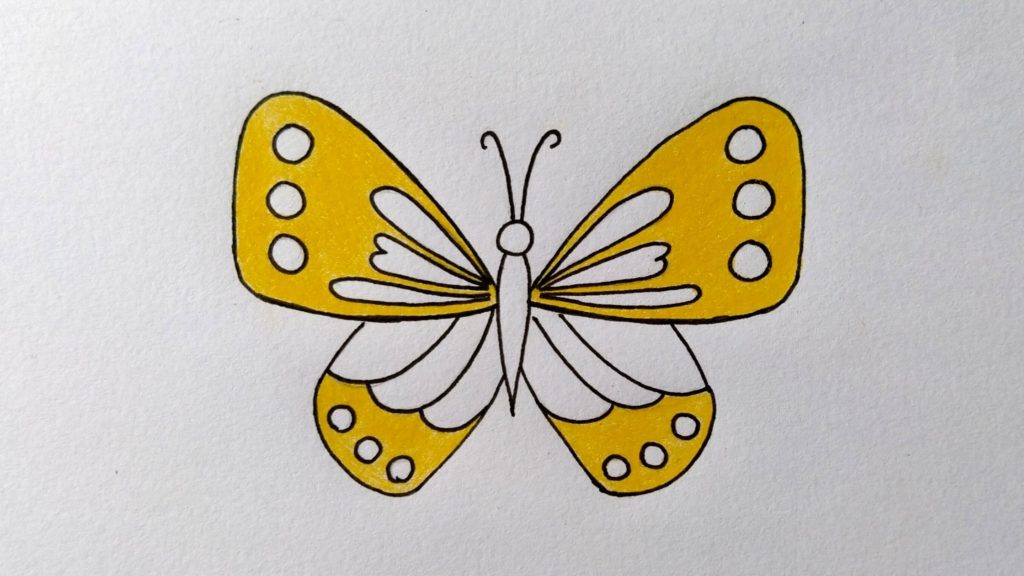
At the end of this step, your butterfly will look some like the above image.
(d) Mix the Yellow Wing Color with Orange:
Now, this is a tricky part therefore you need to observe the reference image very carefully. We will use the orange color pencil and mix this color with the medium yellow on the outer side of the upper left wing. What I mean by mixing the orange color with the yellow color is simply that we have to put some orange color above the yellow color on the butterfly wings. Do it with soft hands and try to give it an even finish just like the reference image. Don’t put the orange color on the entire wing. It needs to be used only on the outer side of the wing above the medium yellow color.
You could also take the help of the video tutorial that has been given above at the beginning portion of this butterfly drawing easy tutorial. That video will also help you out if you are facing any kind of difficulty.
Now, do the exact same steps for the upper right-wing as well.
Now again, we will do the same thing with our lower left and right wings. We will mix the orange color on the medium yellow color on the outer bottom side of both our lower wings with soft hands.
Now, see the butterfly we have drawn till yet. Isn’t it beautiful? You are doing a really great job here! Don’t worry if your drawing looks a little different than our reference image. The more you will practice, the better results you will get. 🙂
(e) Start Coloring the Wing Patterns:
Now it’s time to color the last thing here and i.e, the wing patterns. We are gonna use 2 different colors for our upper and lower wing patterns so as to make our butterfly beautiful. The first one is red and the second one is purple.
Coloring the Large Wing Patterns of Upper Right and Left Wings:
At first, we are gonna color the large wing patterns of the upper right wing. Use the red color pencil to fill all 3 large right-wing patterns. But here is the trick. To make your drawing look more attractive and real, don’t fill the entire large wing pattern. Leave some portion of it blank. See the reference image for more clarity.
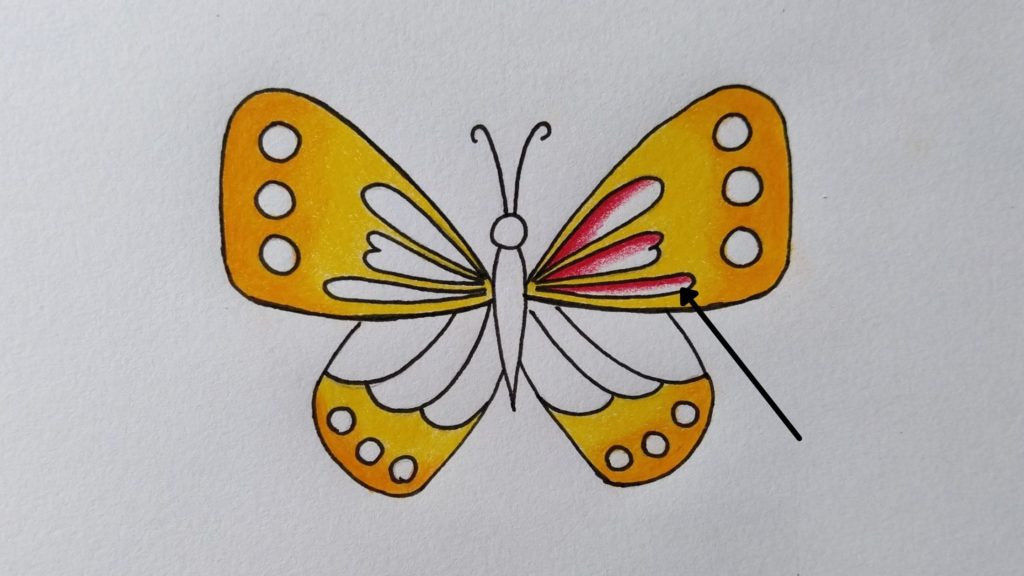
Now use the same color and method to complete the large wing patterns of the upper left-wing as well.
Coloring the Large Wing Patterns of Lower Left and Right Wings:
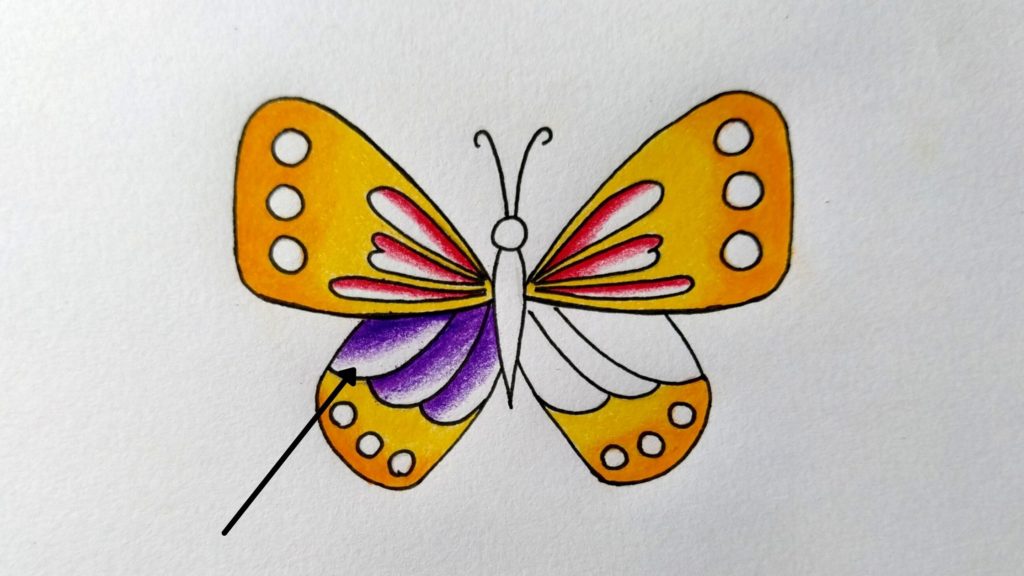
Once we are done with both the left and right upper wing patterns, it’s time to color the wing patterns of the Lower wings. We will first color the large wing patterns of the lower left wing. For this purpose, we will use purple color. But as mentioned above, we will not fill the entire large wing patterns. We will leave some portion of it blank.
Now follow the same steps for the large wing patterns of right-wing as well. Fill all the three wing patterns with purple leaving some portion of it blank.

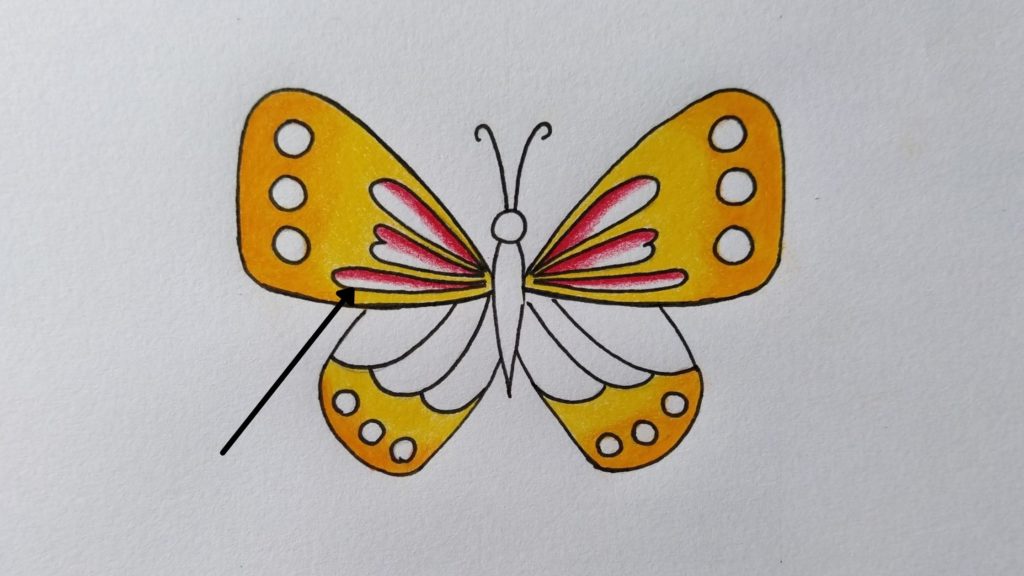
Coloring of Circle Wing Patterns of the Butterfly:
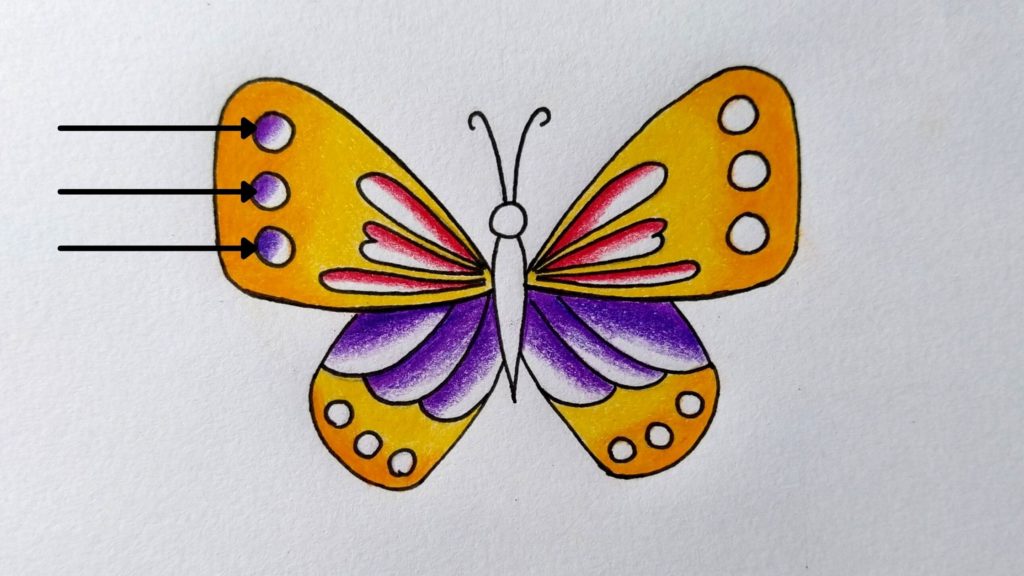
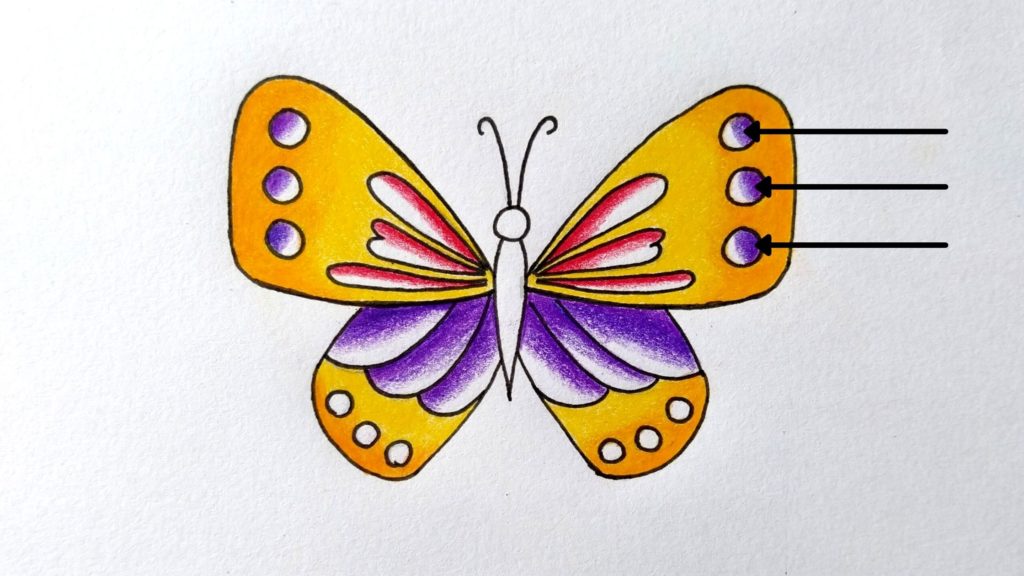
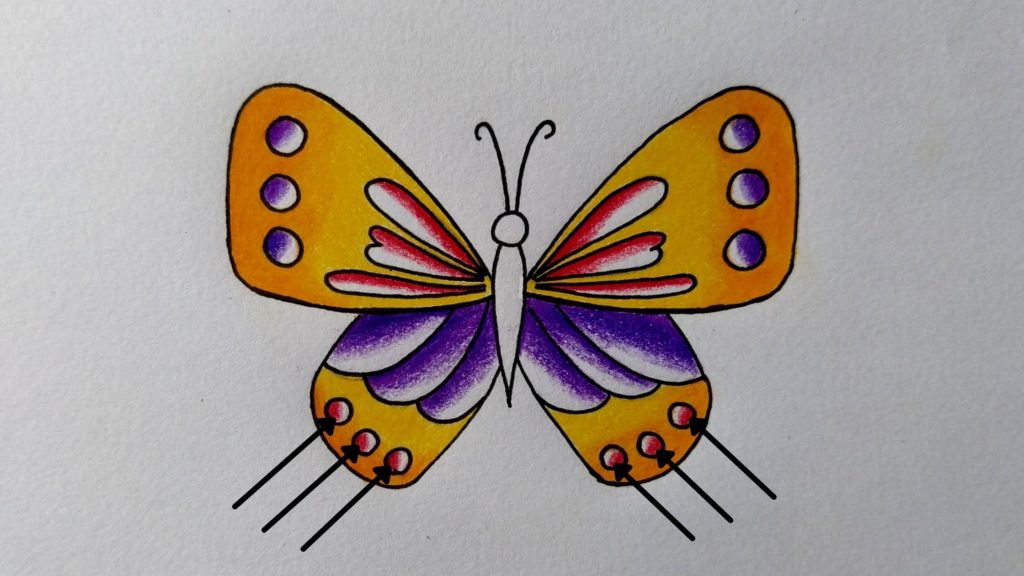
Now, it’s time to color the circle wing patterns of the butterfly drawing. This portion is quite easy to color. Here we will use purple color for upper circle wing patterns and red color for lower circle wing patterns.
Let’s start with coloring the circle wing patterns of the upper left wing. Use the purple color here and using the same method leave some portion of it blank.
Now, use the same color and trick for circle wing patterns of the upper right-wing as well.
Next, use the red pencil color and fill the circle wing patterns of both the lower wings as well. Here also we need not fill the entire circles with color rather we need to leave some portions of it blank.
Hurray! We have completed coloring our butterfly. We have almost completed our butterfly drawing easy tutorial step by step. Now, it’s time to give it the finishing touch.
Step-13: Decorate the Body and Head of the Butterfly:
The last step of this butterfly drawing easy tutorial is to decorate the body and the head in our beautiful butterfly. And let me tell you, it will be an easy step as well. Just fill the entire head of the butterfly with a black color pencil. The head is done!
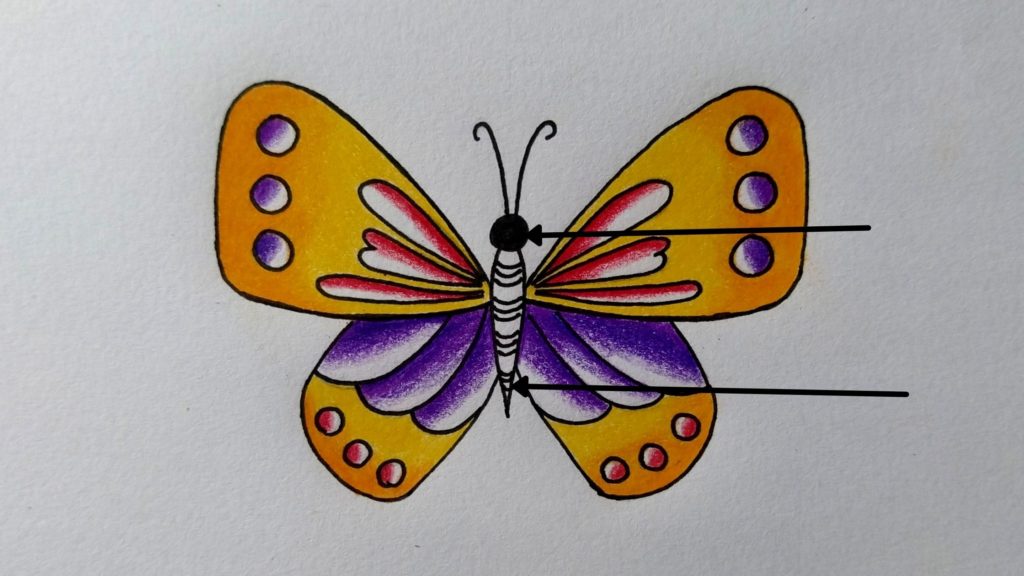
We will use different sets of 3 parallel lines in a little curve shape for the body, just as shown in the reference image above. Fill the entire body with it. Remember, you need to maintain a gap between every two sets of 3 parallel lines.
Congratulations! You have successfully completed the entire butterfly drawing easy step-by-step tutorial with me. The butterfly drawing that we have made together looks so beautiful.
Author’s Advice:
No one achieves perfection instantly. Everyone has to do hard work. So, if you also want to achieve perfection in the drawing field, you have to practice more on an everyday basis. The more you will draw, the better finishing you would be able to achieve.
Now it’s time for me to say goodbye to you but if you learned anything from this butterfly drawing easy step-by-step tutorial, share it with your friends. Tell me if you find this tutorial helpful in the comment section below. And do visit this website for more content like this. So, keep learning, keep growing!


Pingback: Love and Relationships | Value Slaps
Pingback: Our Story | Shifting Wheelers
I visit day-to-day a few web pages and websites
to read articles or reviews, but this webpage presents quality based articles.
Thank you for your appreciation!